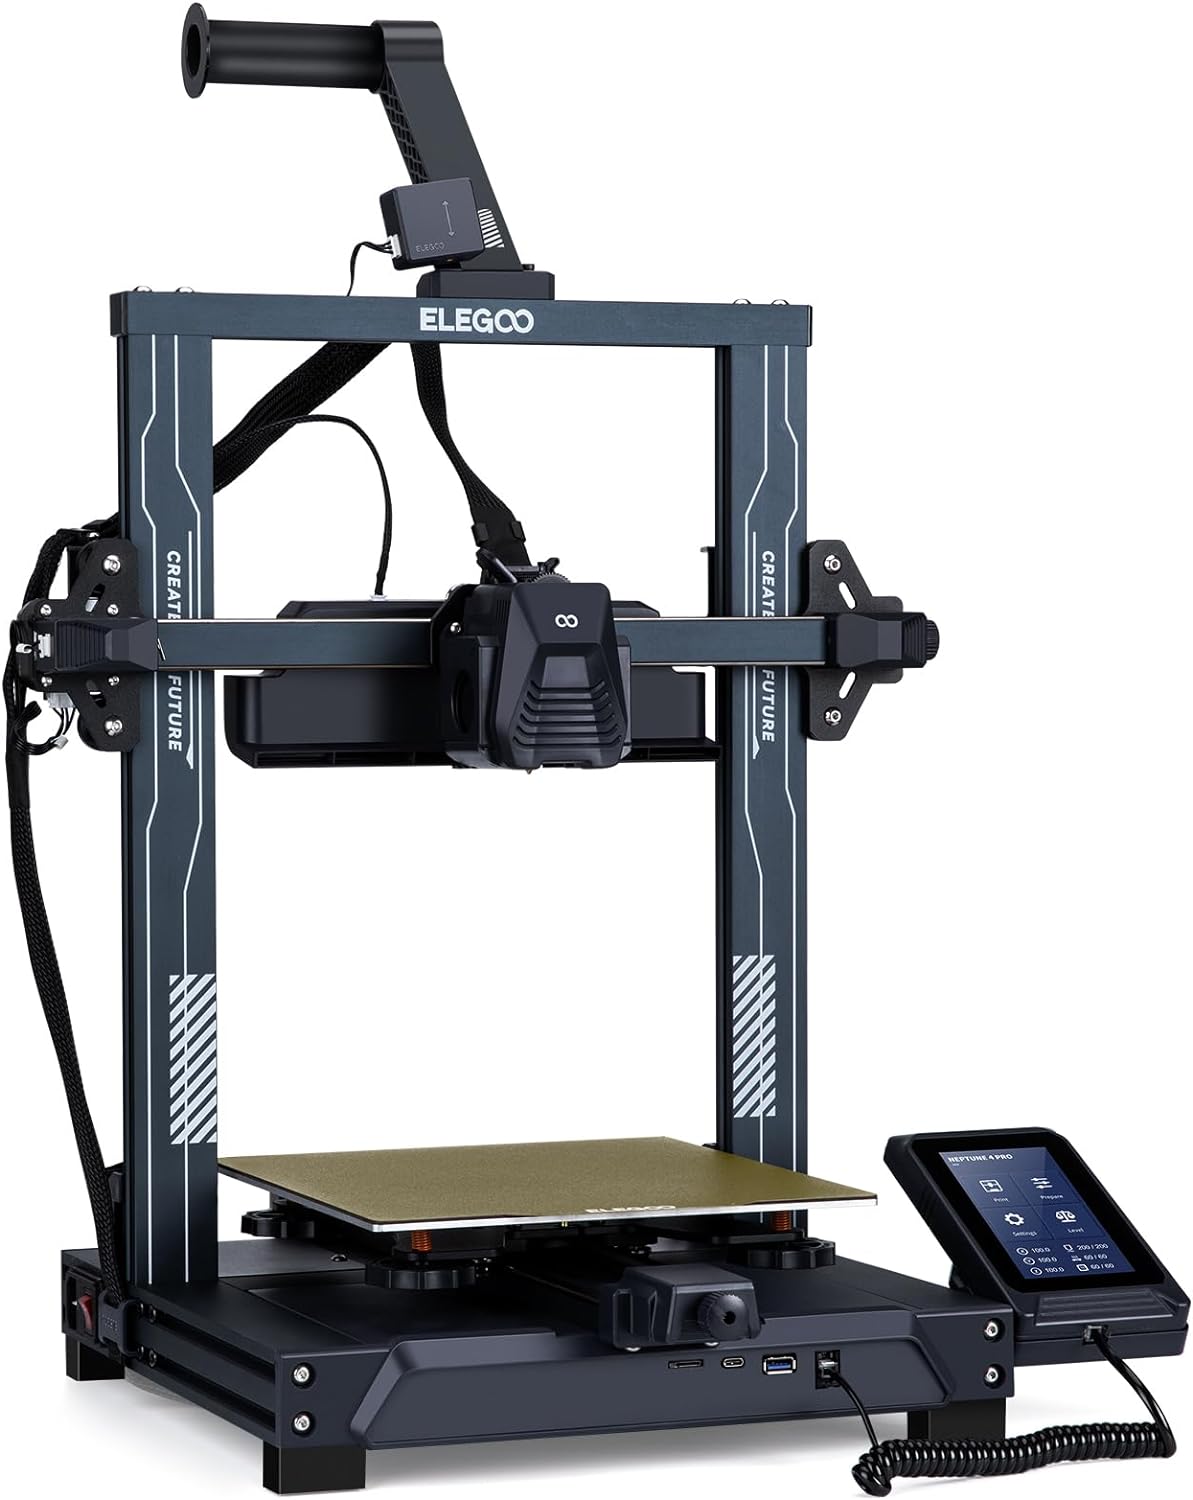
The Neptune 4 Pro is a new 3d Printer series by Elegoo with immense and significant improvement over the previous series Neptune 3 3d printers in terms of printing speed, print quality, reliability, and user-friendliness and all of them have been discussed in detail below. We have also drawn the comparison between the two and you can see clearly why this new released Neptune 4 Pro is better by leagues than the previous release. If you are looking for a high-quality 3D printer that can print a wide range of filaments, the Neptune 4 Pro is a great option.
Video Review of Neptune 4 Pro Features
Key Takeaways
1 – Printing technology: FDM
2 – Build volume: 225mmx225mmx265mm
3 – Dimensions: 475mmX445mmX515mm
4 – Net weight: 8.9kg
5 – Gross weight: 11,6kg
6- Printing speed: Up to 500mm/s
7- Acceleration: 5000mm/s²
8- Printing accuracy: ±0.1mm
9- Layer height: 0.1-0.4mm (recommended 0.2mm)
10- Extruder: Dual-gear direct drive extruder
11- Filament diameter: 1.75mm
12- Nozzle diameter: 0.4mm
13- Nozzle temperature: ≤300°C
14- Heatbed temperature: ≤110°C
15 – Build surface: PEI magnetic platform
16 – Levelling mode: 2.0 automatic levelling over 121 Points
17 – File transfer: USB, WLAN
18- Display screen: 4.3″ removable touchscreen
Here we have mentioned major improvements in Neptune 4 Pro
I) Dual-gear direct drive extruder
The Neptune 4 has a dual-gear direct drive extruder, which is better at handling flexible filaments like TPU than the Bowden tube extruder on the Neptune 3.
II) Intelligent heated bed
The Neptune 4 3d printers come with an intelligent heated bed with two autonomous heating areas, one at 100°C for PLA and one at 110°C for ABS. This allows for faster and more consistent heating of the bed.
III) Four blowers
The Neptune 4 has four blowers for cooling the print, which results in better print quality and faster printing speeds.
IV) Higher nozzle temperature
The Neptune 4 has a nozzle that can reach up to 300°C, which allows it to print a wider range of filaments, including high-temperature filaments like ABS.
V) Built-in power supply
The Neptune 4 printers come with a built-in power supply, which makes it more compact and portable.
VI) 4.3-inch touchscreen LCD
The Neptune 4 has a large, easy-to-use touchscreen LCD for controlling the printer.
VII) Auto bed leveling
The Neptune 4 has a 36-point auto bed leveling system that ensures a level printing surface for every print.
VIII) Filament runout detection
The Neptune 4 series of 3D printers has a filament runout detection sensor that pauses the print if the filament runs out. This helps to prevent failed prints.
IX) Dual Z-axis lead screws
The Neptune 4 Pro has dual Z-axis lead screws for better stability and accuracy.
So this Neptune 4 Pro is a feature-rich 3D printer that is well-suited for both beginners and experienced users. It offers excellent print quality, fast printing speeds, and a variety of features that make it easy to use and reliable.
X) Unboxing & Setting Up Neptune 4 Pro
XI) Printing Experience With Neptune 4 Pro
We had an initial issue with the infill as its nozzle was quite bumped into the print, causing the pattern to break due to these crashes and resulting in a broken infill pattern.
But for all those problems we can always reach the printer retailer, and they offer to replace it with a new one. After a week we received the new printer. During assembly, we almost made a slight mistake but evently the assembly went quickly. After 10 to 15 minutes it was all done.
There’s just a piece of advice here that don’t buy the printer directly from the manufacturer in China but from a distributor in my country. This choice likely facilitated the free replacement of the printer.
After assembling everything, inserted the power cable and switched it on. Before printing, manual bed leveling was necessary and the printer then created an automatically generated mesh, and after setting the Z offset, then we could load the filament onto it. Notably, the new printer was a greater package, such as an insulated heated bed and pre-greased metal guides. At the base where the extruder cable comes out, there is now a plastic cover that was not present with the first Neptune 4. The assembly of the first print took 24 minutes, just like with the first model. We didn’t change anything in the default settings, and it turned out well, though we had to tune the first layer a bit more and that was all.
The toolset sent with the package remained the same, including grease, a tool for adjusting the extruder, wrenches, Allen keys, screwdrivers, a scraper, and a small cutter. However, it lacked a deburring tool, which I recommend buying. A chopstick also comes in handy, as I’ll explain later for specific needs with this printer.
These metal brushes are very useful for cleaning the nozzle between prints. As the printer doesn’t have Wi-Fi installed, you wouldl need something to connect it to your computer. We chose to use a repeater. You plug the supplied cable, and the other end goes into the socket. Then you just plug in and get the Wi-Fi on your Neptune 4. Alternatively, you can use the included USB stick or the card reader that comes with a Micro SD card.
Make sure your new Neptune 4 pro does not wobble on the table. However, some shortcomings remain the same. For example, the extruder cable still rubs against the threaded rod, and the screws guiding the Z-axis are again not tightened. It’s crucial to check and tighten these when starting a new print.
When starting a new print, the extruder will go all the way down the center of the plate and leave a blob of filament there. This blob won’t go well with your first layer. So use the chopstick as the chopstick comes in handy to wipe it from the plate before the print starts.
You may encounter the problem that the layers are not flush with the shell lines everywhere. You may try different settings to fix this problem. Make sure to check the bent parts that cause all these faults, if you don’t toggle much you should keep the same settings and it would be working just fine.