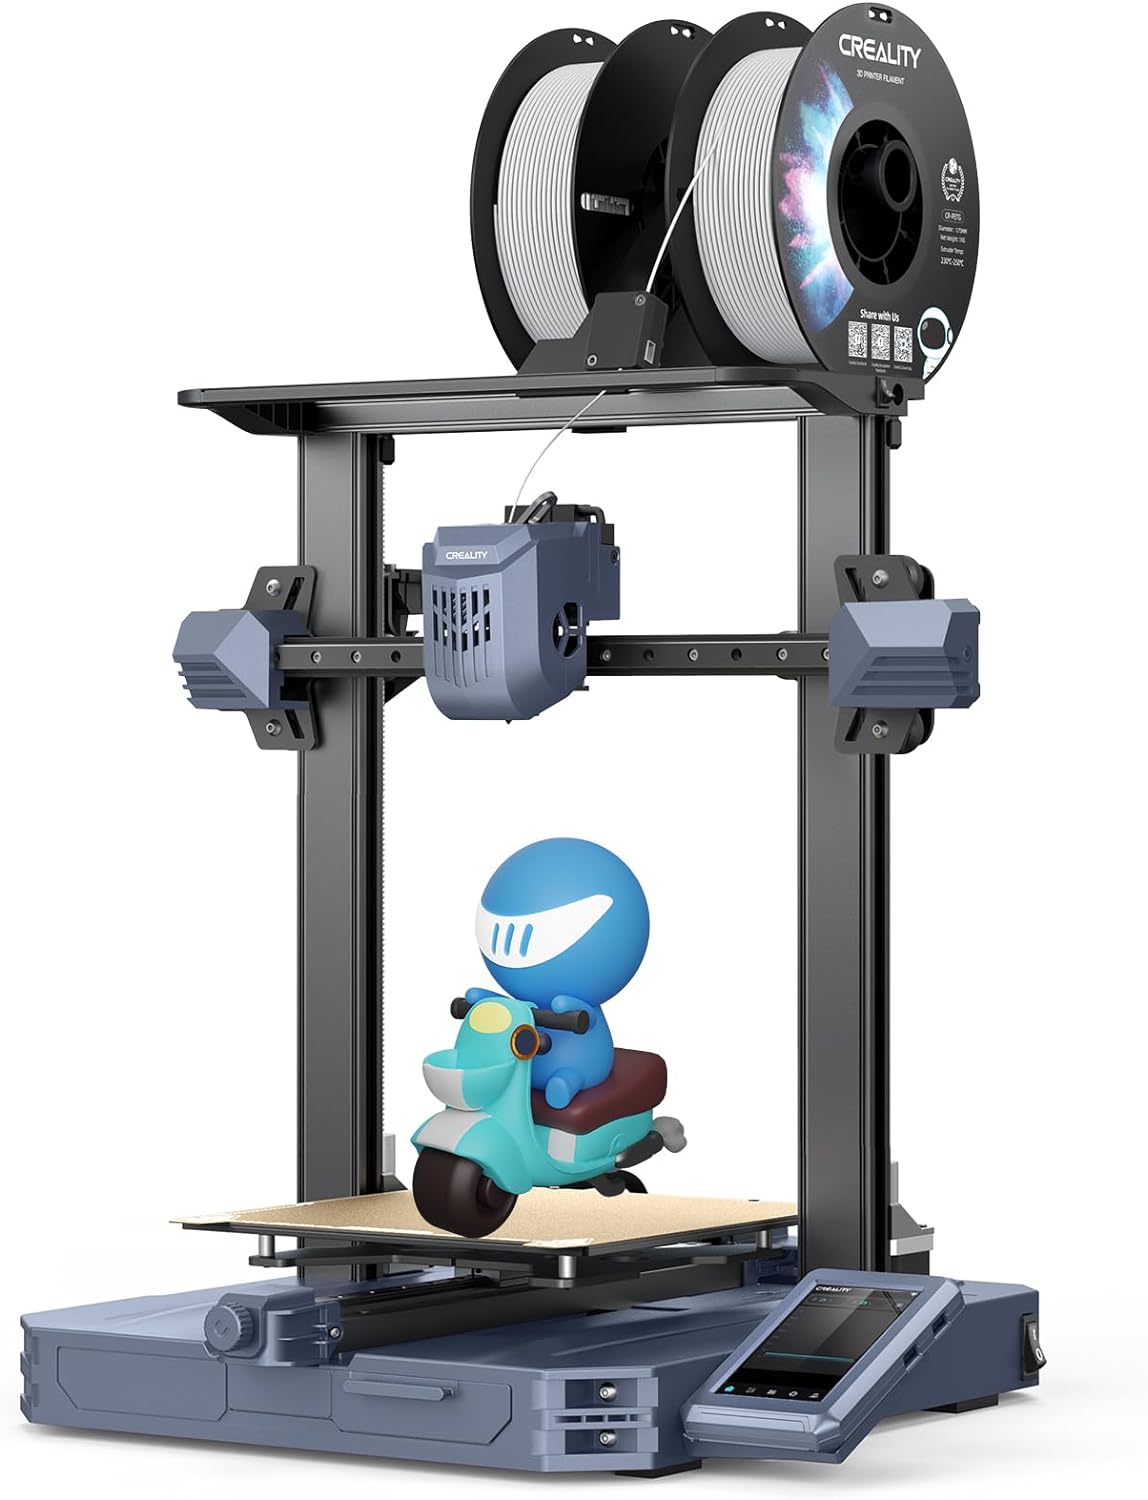
You may think why we have been reviewing this 3d printer when we could have done it years back. Well, it’s never too late, there are obvious reasons for that. First of all, we wanted to let you know guys the difference between Creality CR-10 and how they have imporved it in Ender 3 S1 Pro. So, we are reviewing it in 2024. Well, Creality CR-10 SE 3D Printer was already released with upgraded features that enhance its performance and capabilities which are going to discuss in a bit. So, like with an impressive printing speed of up to 600 mm/sec, this printer enables users to produce objects quickly and efficiently. The inclusion of CR Touch auto-leveling ensures hassle-free calibration, guaranteeing a perfect first layer without the need for manual adjustments. You can read detailed reviews of Creality Ender 3 V2, Ender 3 V3 and Creality K1 here.
Well, we must tell you, in this brief overview, that this 3d printer has been equipped with precision linear rails on both the X and Y axes, which would provide us with stability and accuracy during the printing process. The 300-degree Celsius hotend, paired with the Sprite direct extruder, offers versatility in printing and honestly, there is so much more, so let’s dig deep right in without losing any time:
No products found.
- (a) Printing Speed — The Creality CR-10SE 3D printer can print really fast, up to 600 millimeters per second! This means you can make things quicker, especially big stuff, without losing quality
- (b) Auto Leveling –This printer has a cool feature called auto-leveling. It uses sensors to make sure the first layer of your print is perfect, saving you time from doing it manually
- (c) Better Print Quality — The printer has smart technology to make sure your prints look great. It reduces vibrations for smoother prints and fixes problems like blobs and oozing
- (d) Smooth Movement — It has special rails made of strong steel that help the printing head move smoothly in all directions. This makes your prints more accurate and lasts longer
- (e) Cooling Fan — After printing, a fan cools your model quickly so it doesn’t get messed up. This is especially helpful for tricky prints with lots of details
| Specifications/Feats | Details |
| Build Volume | 220 x 220 x 250mm |
| Printing Speed | ≤600mm/s |
| Layer Height | 0.1-0.35mm |
| Build Surface | Flexible build plate |
| Nozzle Temperature | ≤300°C |
| Heatbed Temperature | ≤110°C |
| Extruder | “Sprite” direct drive extruder |
| Leveling Mode | Auto leveling |
| Display Screen | 4.3″ touch screen |
| Mainboard | 32-bit mainboard |
| Connectivity | USB drive, WiFi |
| Lighting Kit | Yes |
| File Transfer | USB drive, LAN printing, cloud printing |
| Slicing Software | Creality Print, Cura, Simplify3D, PrusaSlicer |
| Formats for Slicing | STL, OBJ, 3MF, STEP |
| Supported Filaments | PLA, PETG, PET, TPU, PLA Wood, ABS, ASA, PA, PLA-CF |
Explanation of each specification has been described below.
(I) Build Volume
This refers to the maximum size of the object you can print with the 3D printer. For this printer, it can print objects that are up to 220 millimeters wide, 220 millimeters deep, and 250 mm tall.
(II) Printing Speed
This indicates how fast the printer can lay down material to create the object. With a maximum speed of 600 millimeters per second, this printer can produce objects relatively quickly.
(III) Layer Height
This specification refers to the thickness of each layer of material that the printer deposits and of course that pretty much sums to the length and breadth of our printing models as you understand in 2024 we love to 3d-print different models. For this printer, you can choose a layer height between 0.1 to 0.35 millimeters, allowing for different levels of detail and surface finish.
(IV) The Features of Build Surface
The build surface is the platform where your object is printed. In this case, the printer comes with a flexible build plate, which can make it easier to remove finished prints from the surface.
(v) Nozzle Temperature
This is the maximum temperature that the printer’s nozzle, which extrudes the printing material, can reach. With a maximum temperature of 300 degrees Celsius, this printer can handle a wide range of filament materials.
(VI) Heatbed Temperature
The heatbed is the surface upon which the object is printed, and it is heated to prevent warping and help with adhesion. This printer’s heatbed can reach a maximum temperature of 110 degrees Celsius.
(VII) Extruder
The extruder is the part of the printer that pushes the printing material (filament) through the nozzle. This printer features a “Sprite” direct drive extruder, which can provide more precise control over filament extrusion.
(VIII) Leveling Mode
This refers to how the printer ensures that the first layer of material is laid down evenly. With auto-leveling, the printer automatically adjusts the height of the print bed to compensate for any unevenness, ensuring a smooth and accurate first layer.
(IX) LCD/Display Screen
The display screen is the interface through which you interact with the printer. This printer features a 4.3-inch touch screen, making it easy to navigate and control the printing process.
(X) Mainboard
The mainboard is the central component of the printer’s electronics, controlling its various functions. With a 32-bit mainboard, this printer can process commands quickly and efficiently.
(XI) Connectivity
This specifies how you can connect to the printer. With USB drive and WiFi connectivity, you can transfer print files either directly from a USB drive or over a wireless network.
(XIII) Lighting Kit
This indicates whether the printer comes with built-in lighting to illuminate the printing area. With a lighting kit included, it can be easier to monitor the printing process, especially in low-light environments.
(XIV) File Transfer
This specifies the different methods you can use to transfer print files to the printer. With support for USB drive, LAN printing, and cloud printing, you have multiple options for sending print files to the printer.
(XV) Slicing Software
Slicing software is used to prepare 3D models for printing by converting them into a series of thin layers. This printer is compatible with various slicing software programs, including Creality Print, Cura, Simplify3D, and PrusaSlicer. These are the file formats supported by the slicing software for preparing print files. Common formats include STL, OBJ, 3MF, and STEP.
(XVI) Supported Filaments
This specifies the types of printing materials (filaments) that are compatible with the printer. Supported filaments include PLA, PETG, PET, TPU, PLA Wood, ABS, ASA, PA, and PLA-CF.
Comparison of Creality CR 10 SE with Ender 3 S1 Pro in neck-to-neck comparison of different features and upgrades have been mentioned in the comparison table below:
Specs Creality CR-10 SE Ender 3 S1 Pro
| Build Volume | 220 x 220 x 250mm | 220 x 220 x 250mm |
| Printing Speed | ≤600mm/s | ≤150mm/s |
| Layer Height | 0.1-0.35mm | 0.1-0.3mm |
| Build Surface | Flexible build plate | Tempered glass build plate |
| Nozzle Temperature | ≤300°C | ≤260°C |
| Heatbed Temperature | ≤110°C | ≤100°C |
| Extruder | “Sprite” direct drive extruder | Upgraded extruder |
| Leveling Mode | Auto leveling | Manual leveling |
| Display Screen | 4.3″ touch screen | 4.3″ color LCD touchscreen |
| Mainboard | 32-bit mainboard | 32-bit mainboard |
| Connectivity | USB drive, WiFi | USB drive, WiFi |
| Lighting Kit | Yes | No |
| File Transfer | USB drive, LAN printing, cloud printing | USB drive, LAN printing, cloud printing |
| Slicing Software | Creality Print, Cura, Simplify3D, PrusaSlicer | Creality Print, Cura, Simplify3D, PrusaSlicer |
| Formats for Slicing | STL, OBJ, 3MF, STEP | STL, OBJ, 3MF, STEP |
| Supported Filaments | PLA, PETG, PET, TPU, PLA Wood, ABS, ASA, PA, PLA-CF | PLA, PETG, TPU, ABS, Wood, PLA-CF |
- Printing Speed — CR-10SE has a faster printing speed (≤600mm/s) compared to Ender 3 S1 Pro (≤150mm/s), making it capable of producing prints more quickly
- Layer Height — Both printers offer similar layer height ranges, but CR-10SE can achieve a slightly thicker maximum layer height (0.35mm) compared to Ender 3 S1 Pro (0.3mm)
- Build Surface — CR-10SE comes with a flexible build plate, while Ender 3 S1 Pro features a tempered glass build plate. The choice between flexible and tempered glass plates depends on user preference and material compatibility.
- Nozzle Temperature — CR-10SE supports higher nozzle temperatures (≤300°C) compared to Ender 3 S1 Pro (≤260°C), offering more versatility in filament options, especially for high-temperature materials
- Heatbed Temperature — CR-10SE’s heatbed can reach a higher maximum temperature (≤110°C) compared to Ender 3 S1 Pro (≤100°C), which may be beneficial for preventing warping and improving adhesion, particularly with certain filament types
- Extruder — Both printers feature different types of extruders. CR-10SE has a “Sprite” direct drive extruder, while Ender 3 S1 Pro comes with an upgraded extruder. The performance and features of these extruders may vary, affecting printing quality and reliability
- Leveling Mode — CR-10SE offers auto-leveling, which simplifies bed leveling process, while Ender 3 S1 Pro requires manual leveling. Auto-leveling can save time and ensure more consistent print quality
- Display Screen — Both printers have touchscreens, but Ender 3 S1 Pro’s screen is a color LCD touchscreen, which may provide a more user-friendly interface compared to CR-10SE’s touch screen
- Lighting Kit — CR-10SE comes with a lighting kit, providing illumination for the printing area, whereas Ender 3 S1 Pro does not include this feature
No products found.

